 By Dan Ciprari, CEO and Co-founder, Pointivo Inc.
Roofing is one of the earliest construction segments to begin adopting the use of UAS technology for gathering measurements.
The use of unmanned aerial systems (UAS) has grown tremendously in just a few years. Consulting firm PwC noted in its 2016 PwC Global Report that the global market for business services using this technology is valued at more than $127 billion. The report notes that the largest single application is infrastructure, valued at $45.2 billion. As the use of UAS continues to advance, construction companies stand to benefit the most, as these solutions offer improved safety, lower costs, and better workflow integration to convert data into actionable insights.
Roofing is among the earliest construction segments to utilize UAS technology. When roof measurement reports based on aerial imagery first appeared approximately 10 years ago, the precision and reliability of aerial-based measurements were still unclear. The debate about accuracy continues, even while UAS-generated measurements have shown they can be much faster and eliminate the potential for injury during manual measurement.
Haag Engineering, a forensic and engineering consulting firm, recently completed an independent accuracy study to validate the precision of UAV-based roofing measurement workflows. These processes use intelligence algorithms to automatically extract roof geometry and measurements from unmanned aerial vehicle (UAV) imagery. The results were then compared to manual measurements.
How Haag Engineering conducted the test
 Experienced field surveyors independently measured 13 roofs using traditional survey methods, while independent pilots flew autonomous Kespry UAVs over these roofs to capture images and generate 3D models.
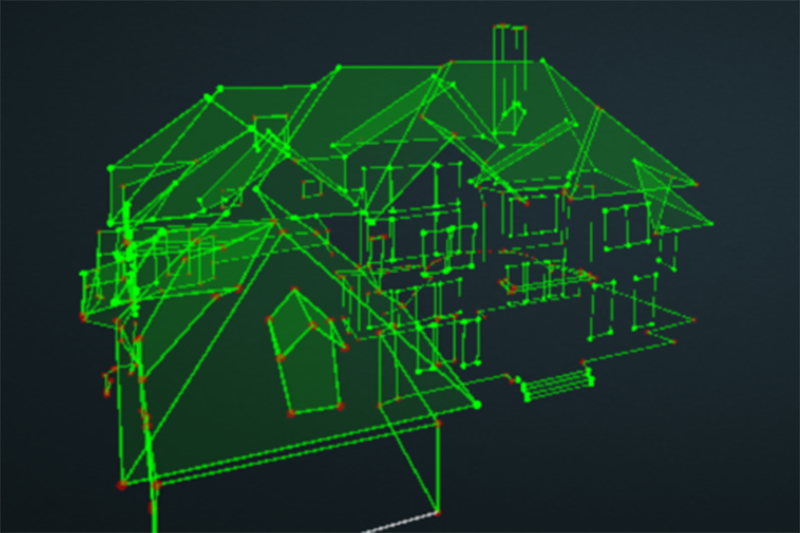
The Kespry UAV was part of a proprietary UAS platform, which included autonomous UAV flight and the capture of high-resolution imagery, as well as 3D processing in the cloud. Once the 3D data was generated, it was then transferred to a 3D intelligence platform where computer vision and machine learning algorithms detected the roof structure, classified edge types, and extracted accurate geometry and measurements for the entire roof, and then generated a detailed CAD model.
These automated measurements–which included lengths for each roof edge, area and pitch for each roof plane– were then compared with the manually collected measurements. Automated measurements were rounded to the nearest millimeter and manual measurements rounded to the nearly ¼ inch, even though measurement to the nearest inch is a typical industry practice.
The roofs
Roof pitches ranged from flat to 12:12 and individual roof areas spanned approximately 10 to 62 squares. The test included 17 buildings, totaling approximately 535 squares (one roofing square equals 100 square feet). Four of the roofs were too unsafe to measure and were verified through conventional reporting. All sloped roofs were asphalt composition shingles, the most popular type of sloped roofing in the U.S. Flat roofs were modified bitumen. All properties were located in the Dallas-Ft. Worth Metroplex.

Average variations fall well within industry benchmarks
When comparing roof area (See Figure 1), the Haag Engineering study found that for the 13 roofs that were measured, variations between the manual and automatic measurements ranged from +1.2 percent to -2.7 percent per individual roof. The average difference of 0.6 percent was within the industry goals of +/- 2 percent. When comparing differences in absolute values, the average variation was 1.1 percent, still comfortably within the +/- 2 percent range.
Automated measurements were highly accurate on edge lengths when compared to manual measurements, and were thus shown as providing highly accurate area results.
It should be noted that these tests used GPS data gathered from sensors on the drone itself to provide scaling data. In the future, accuracy can be improved further by utilizing more precise scaling methods like ground control points (GCP’s) or RTK GPS when the need is required.
Detailed Results
The greatest roof area difference was 95 square feet (2.7 percent of the roof area) while the smallest was just 3 square feet (0.2 percent). The roof with the greatest difference—#6—was covered by overhanging tree branches along its front edge.
Roof #9 contained a flat roof section that measured approximately 17 squares and was partially overhung by the adjacent sloped roof. However, the automated computed area for this flat roof section was still within 1 percent of the manually-calculated area.
Conclusions
Haag Engineering’s final report summed up the results well: “The automated solution proved reliable for the 13 roofs sampled, as the total area computed 99.4% accurate on average.” These results have proved the UAS can be a viable option to capture accurate roof measurements from the safety of the ground.
Furthermore, UAS enabled much faster measurement than manual means, and much safer. In fact, the original intent of the study was to measure 17 roofs, but 4 of the 17 were too slick and/or steep to reliably measure manually, without better weather and/or a rope and harness. These roofs were easily measurable by UAS.
As UAS technology continues to advance and 3D intelligence platforms become a mainstream solution, construction firms will find an increasing number of uses. Improved accuracy, enhanced safety, lower costs and improved analytics of UAS-generated data will make these solutions increasingly attractive in a wider range of applications.
Note: This article first appeared on the SPAR 3D website and can be viewed here.
